| With this technique instead of using stickers for the shell design, temporary tattoos are used instead. These give the effect that the design has been spray painted on. |
|
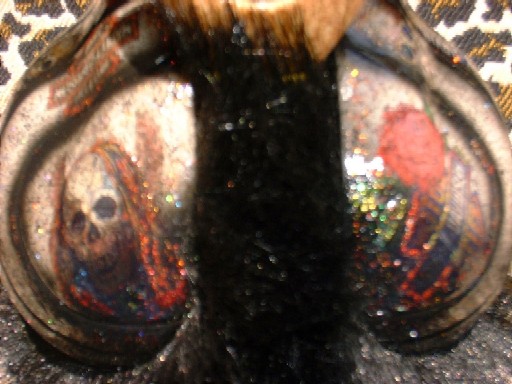
How to customize your Shelby this way I discovered that temporary tattoos, sealed with a glaze to be permanent, can look great on a Shelby shell if you select designs and colours with this in mind: most temporary tattoos I have seen have some transparent or translucent areas which means that the underlying shell colour and patterns will show through. Do not assume you will get the same opaque look you get with stickers, the effect is more painterly. Here are the materials I used in creating this custom Shelby and directions for trying temporary tattoos yourself. Some packs of temporary tattoos: you can us them as is OR cut up tattoo designs as I did if you only want to use parts of them, or recombine or layer them to make new designs! Judikins Diamond Glaze Glitters as desired, I used colours that were in the tattoos as well as a black one to pick up on the speckled look of the shell as it was already out of box. Paints compatible with plastics. Test first if not sure, find a similar plastic and test. I used a mixture of glow in the dark acrylic paint and gold glass paints in the eyes of the creature tattoo above Shelby's eyes. A paper towel, and some water.**CAREFUL NOT TO GET ANY WATER IN THE BATTERY COMPARTMENT OR INSIDE OF THE SHELBY** Directions: cut up tattoos, decide on placement on shell surface. Follow package directions for applying tattoos, only of course you will be doing all this upon the shell surface. Basically what you are doing is peeling off a protective layer from the tattoo, pressing and holding it onto the surface of the shell, then placing a damp, not drippy, paper towel over the back of the tattoo for whatever period of time the package directions say (in my case it was 30 seconds) Remove paper towel, remove backing and your tattoo should be in place now. Before you do another step, apply a layer of glaze over the tattoo so its permanent. Once glaze over tattoos is dry, you can decorate the rest of the shell following directions for the BLUsparkle Shelby (can be found here) Some tips: you can paint sections of the tattoos for emphasis, as I did in the eyes of one. You can use a small brush, apply glaze to parts of the designs you wish to highlight, as I did with the "deaths head" tattoo, the blood drops and the Harley logo on Hellby (see pictures) then sprinkle glitter on it. when you are done, take a picture and email it so yours can be shown here in our gallery along with the others! Be sure if you post pics of yours elsewhere that you link back to this site as the source of the tips and directions you followed. Thanks! Go to the next page to see another technique for customizing Shelbys... Customized Shelby Pictures |
||
|
|
|
|
|
Hellby (Back) |
||